How To Change Oil In Car And Keep Your Engine Running Smooth
Changing oil in your car is one of the easiest and most important maintenance jobs you can do yourself. This guide walks you through every step, from picking the right engine oil and oil filter to draining the old oil and refilling properly. You will learn which tools are essential, common mistakes to avoid, and how to check for leaks after finishing. Follow these steps and you will save money while keeping your engine running strong for years.
How to Change Oil in Car: Complete Step-by-Step DIY Guide
Changing oil in your car is one of the most important maintenance tasks you can perform. Fresh engine oil keeps your motor running smooth and prevents expensive damage. This guide covers how to change oil in car from start to finish, including the tools you need and common mistakes to avoid. You will learn the right oil type for your vehicle and how to complete the job safely in your own garage. By the end, you will feel confident handling this essential oil change on your own.
In my years turning wrenches, I have changed oil on hundreds of vehicles from sedans to heavy-duty trucks. How to change oil in car is a skill every driver should own. It saves you money and keeps your engine running strong. Most people pay a shop to do this simple job when they can do it themselves.
The entire process takes less than thirty minutes once you know the steps. You just need a few basic tools and the right engine oil for your vehicle. Let us walk through everything you need to know.
Key Takeaways
- Right Tools Matter: A socket wrench set, torque wrench, drain pan, and jack stands are essential for a safe oil change.
- Choose the Correct Oil: Always match the viscosity and oil type to your vehicle’s OEM specifications in the owner manual.
- Safety Comes First: Use jack stands, let the engine cool, and wear gloves and safety glasses before starting.
- Replace the Filter Every Time: A fresh oil filter keeps contaminants out of your crankcase and lubrication system.
- Track Your Service Interval: Most vehicles need an oil change every 5,000 to 7,500 miles depending on driving conditions.
- Dispose of Old Oil Properly: Never pour used oil down a drain. Take it to a recycling center or auto parts store.
📑 Table of Contents
- Essential Tools and Equipment for This Job
- OEM and Aftermarket Replacement Parts Needed
- Critical Safety Precautions Before You Start
- Complete Step-by-Step Guide on How to Change Oil in Car
- Common DIY Mistakes to Avoid During Oil Changes
- Pro Mechanic Tips for Better Oil Change Results
- Frequently Asked Questions About Oil Changes
- Final Thoughts on Successfully Completing This Job
Essential Tools and Equipment for This Job
You need the right gear before you start draining any oil. Having everything ready prevents delays and frustration. Below is a checklist of the tools you will need for this job.
| Tool | Purpose | Estimated Cost |
|---|---|---|
| Socket wrench set | Removes drain plug and filter cap | $20-$40 |
| Oil filter wrench | Loosens stuck oil filter | $10-$15 |
| Drain pan | Catches old engine oil | $8-$12 |
| Torque wrench | Tightens plug to factory specs | $25-$60 |
| Jack and jack stands | Lifts and supports the vehicle | $30-$50 |
| Funnel | Prevents spills when filling new oil | $5-$8 |
| Gloves and safety glasses | Protects hands and eyes | $5-$10 |
Make sure your drain pan is large enough to hold all the old engine oil. Most cars hold between four and six quarts. Keep a rag handy to wipe up any spills. A torque wrench is especially important because it ensures you tighten the drain plug to the correct specification without overdoing it.
OEM and Aftermarket Replacement Parts Needed
You need the correct parts before you begin. Using the wrong oil type or filter can cause serious engine damage. Check your owner manual for the exact specifications your vehicle requires.
| Part | What to Look For | Why It Matters |
|---|---|---|
| Engine oil | Correct viscosity and volume | Ensures proper lubrication |
| Oil filter | OEM or quality aftermarket match | Traps contaminants from crankcase |
| Drain plug washer | Rubber or copper, per OEM spec | Prevents leaks at the drain point |
| New oil filter gasket | Comes with most filters | Prevents leaks at filter housing |
The oil type depends on your driving conditions. Synthetic oil works well in extreme temperatures and heavy towing. Conventional oil is fine for normal daily driving around town. Always check the viscosity rating on the bottle. OEM specifications in your manual tell you exactly what grade to use. The oil capacity for your engine is also listed in the manual or on the oil fill cap.
Critical Safety Precautions Before You Start
Working under a vehicle can be dangerous if you skip safety steps. Hot oil can cause burns if you do not let the engine cool. Follow these precautions every single time.
Always park on a flat, level surface before you begin. Engage the parking brake and place wheel chocks behind the rear tires. Never rely on just a jack. Use jack stands to support the vehicle securely. A jack alone can slip and cause serious injury.
Wait at least ten minutes after turning off the engine. The oil needs time to cool down. Hot engine oil can reach temperatures over 200 degrees Fahrenheit. Wearing gloves and safety glasses protects you from splashes. If you do not feel comfortable working under the car, consider using an oil drain valve from below. Some vehicles have a removable drain plug on the undercarriage that is easier to reach.
Remember this saying from my early shop days: “Change your oil on time, and your engine will thank you for decades.” That simple habit has saved countless engines from premature failure.
Complete Step-by-Step Guide on How to Change Oil in Car
This is the core of the entire process. Follow each step carefully and do not rush. Taking your time ensures a clean, leak-free result.
Preparing Your Vehicle and Gathering Supplies
Start by gathering all your tools and new parts near the oil pan. Run the engine for two to three minutes. This warms the oil and helps it flow out faster. Then turn off the engine and wait ten minutes for it to cool slightly. Make sure you have your drain pan, socket wrench, new filter, and fresh oil all within arm’s reach.
Finding the Drain Plug and Oil Filter Location
Slide under the vehicle and locate the drain plug on the oil pan. The oil filter is usually nearby, mounted on the engine block. Use your phone to take a photo before you start. This helps you remember exactly where everything goes back. Different engines place the filter in different spots, so confirming the location saves time.
As one old mechanic told me, “The cheapest maintenance you can do is an oil change. The most expensive is ignoring one.” That wisdom has stuck with me through every job I have done.
Draining the Old Engine Oil the Right Way
Place your drain pan directly below the drain plug. Use the socket wrench to loosen the plug slowly. Remove it carefully and let the old oil flow out completely. This takes about five to ten minutes depending on the engine. The flow will start fast and then slow to a drip.
While the oil drains, check the condition of the drain plug washer. Replace it if it looks worn or flattened. A new washer ensures a tight seal when you reinstall the plug. Also inspect the oil pan for any metal shavings. Small particles are normal, but large flakes could indicate internal engine wear.
Steps to Remove and Install the New Oil Filter
Use the oil filter wrench to loosen the old filter. Turn it counterclockwise by hand once it is loose. Be ready for some residual oil to spill out. Before installing the new filter, rub a little fresh oil on the rubber gasket. This creates a better seal and makes removal easier next time.
Screw the new filter on by hand until it seats firmly. Then tighten it about three-quarters of a turn. Do not overtighten. This can damage the gasket and cause leaks. The oil filter traps dirt and metal particles that circulate through the lubrication system. A clogged filter restricts oil flow and starves the engine.
Refilling the Engine with Fresh Clean Oil
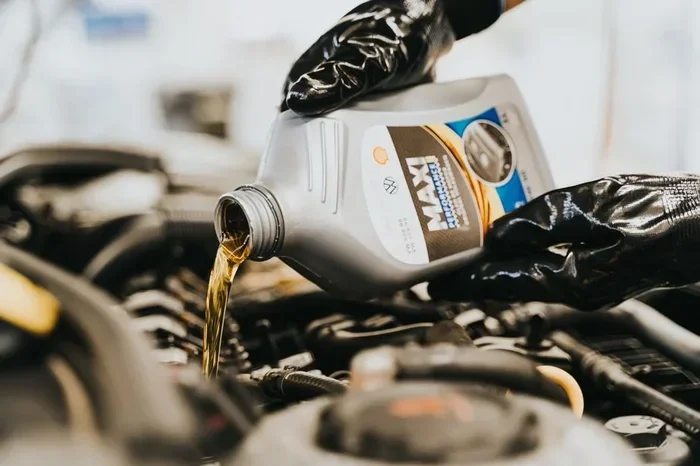
Remove the fill cap on top of the engine. Place a funnel in the opening to prevent spills. Pour in the recommended amount of fresh engine oil. Check your manual for the exact oil capacity for your engine. Overfilling can cause pressure problems, and underfilling leads to poor lubrication.
| Vehicle Type | Typical Oil Capacity | Recommended Viscosity |
|---|---|---|
| Compact Sedan | 4-5 quarts | 0W-20 or 5W-30 |
| Mid-Size Sedan | 5-6 quarts | 5W-30 or 10W-30 |
| SUV or Truck | 6-8 quarts | 5W-30 or 10W-40 |
| Performance Vehicle | 5-7 quarts | 5W-40 or 10W-60 |
Replace the fill cap and wipe away any drips. The whole process should take about twenty to thirty minutes from start to finish. Keep the old oil container for proper disposal later.
Checking for Leaks and Confirming Oil Level
Start the engine and let it run for one to two minutes. Check underneath for any drips from the drain plug or filter. If you see leaks, turn off the engine and tighten the connection slightly. Do not overtighten, as this can strip the threads.
Turn off the engine and wait two minutes. Pull the dipstick to check the oil level. Add more oil if needed until it reaches the full mark on the dipstick. The lubrication system needs the right amount of oil to work properly. If you do not have your key after completing the work, refer to our guide on how to start a car without a key using safe methods.
| Vehicle Type | Drain Plug Torque | Oil Filter Torque |
|---|---|---|
| Compact Car | 20-25 ft-lbs | 12-15 ft-lbs |
| Mid-Size Sedan | 25-30 ft-lbs | 15-20 ft-lbs |
| SUV or Truck | 30-40 ft-lbs | 20-25 ft-lbs |
| Performance Vehicle | 35-45 ft-lbs | 18-22 ft-lbs |
Common DIY Mistakes to Avoid During Oil Changes
Everyone makes mistakes the first few times. Knowing what to avoid saves you time and money. Here are the most common errors people make.
Using the Wrong Oil Viscosity. Always match the viscosity grade to what your manual specifies. Using 10W-30 when the engine needs 5W-20 can cause poor lubrication. This leads to increased wear over time. Check the bottle label carefully before you pour. The viscosity number tells you how thick the oil is at different temperatures.
Forgetting to Replace the Oil Filter. Some people reuse the old filter to save money. This is a bad idea. Old filters are clogged with contaminants. A new oil filter keeps debris out of your crankcase and engine passages. Always install a fresh filter with every change. The cost of a new filter is small compared to the damage a clogged one can cause.
Over-Tightening the Drain Plug. Crushing the plug or washer with too much force causes leaks. Use a torque wrench to tighten to the factory specification. Most drain plugs need between 20 and 30 foot-pounds of torque. Check the table above for common values.
Dropping the Drain Plug Into the Oil Pan. This happens more often than you think. Always hold the plug in your hand while loosening it. If it drops, you will need to tilt the pan or use a magnet to retrieve it. Take your time and stay focused.
| Oil Type | Best For | Change Interval |
|---|---|---|
| Conventional Oil | Normal daily driving | 3,000-5,000 miles |
| Synthetic Blend | Moderate towing and heat | 5,000-7,500 miles |
| Full Synthetic Oil | Extreme temperatures and performance | 7,500-10,000 miles |
Pro Mechanic Tips for Better Oil Change Results
Experienced mechanics follow a few extra steps that make a big difference. These tips will help you get professional-quality results at home.
Change the Oil When It Is Warm. Warm oil flows out faster and carries more contaminants with it. Run the engine for a few minutes before you drain. This also helps the oil filter release trapped particles more easily. However, do not work on hot oil. Let it cool for at least ten minutes to avoid burns.
Track Your Service Interval. Most modern vehicles have an automated service interval reminder. However, you should also keep a manual log. Write down the date, mileage, and oil type used each time. This helps you stay on top of your maintenance schedule. It also makes resale negotiations easier since you can prove consistent care.
Check for Recalls or Technical Bulletins. Some manufacturers issue updates on oil consumption or filter design. A quick online search can reveal if your vehicle has known issues. Staying informed keeps your engine oil system working at its best. If you have lost your only key and need professional assistance, our lost my only car key replacement guide can help you get back on the road.
| DIY Oil Change | Shop Oil Change | Savings |
|---|---|---|
| $20-$35 in materials | $40-$80 total cost | $20-$45 per change |
| Full control over oil and filter quality | Depends on shop parts quality | Choose premium oil yourself |
| Takes 20-30 minutes | Takes 15-30 minutes wait time | No shop wait required |
| Builds mechanical skills and confidence | No hands-on experience gained | Long-term knowledge benefit |
DIY oil changes save you money and give you control over the quality of parts used. A shop typically charges between $40 and $80 for a basic oil change. Doing it yourself costs around $20 to $35 in materials. However, if you are not comfortable working under the vehicle, a professional is a safe choice.
Frequently Asked Questions About Oil Changes
What Type of Oil Should I Use for My Car?
Check your owner manual for the recommended viscosity and oil type. Most modern engines use synthetic or synthetic blend oil. The OEM specifications on the oil bottle cap tell you the correct grade. Using the wrong oil type can reduce engine performance and fuel efficiency over time.
How Often Should I Change My Engine Oil?
Most manufacturers recommend changing oil every 5,000 to 7,500 miles. Older vehicles with conventional oil may need changes every 3,000 miles. Your driving habits also matter. Stop-and-go city driving and extreme cold shorten the oil change interval. Check your manual for the exact service interval for your specific model.
Can I Change Oil Without a Lift or Jack?
Yes, you can if your vehicle has low enough ground clearance. Some sedans allow you to access the drain plug from below without any lifts. You will need to lie flat on the ground and use a torque wrench with an extension. If you cannot reach comfortably, use a ramp or jack and jack stands for safety.
What Happens If I Skip Regular Oil Changes?
Old oil loses its lubricating properties over time. It becomes contaminated with metal particles and sludge. This increases friction inside the engine. Over time, skipping changes can lead to overheating, reduced fuel economy, and even engine failure. Regular maintenance keeps the lubrication system working properly and extends engine life.
Is It Better to Change Oil Yourself or at a Shop?
DIY oil changes save you money and give you control over the quality of parts used. A shop typically charges between $40 and $80 for a basic oil change. Doing it yourself costs around $20 to $35 in materials. However, if you are not comfortable working under the vehicle, a professional is a safe choice. Both options keep your engine healthy when done correctly.
How Do I Dispose of Old Engine Oil Properly?
Never pour old oil down a drain or onto the ground. Take it to a local auto parts store or recycling center. Most shops will accept used oil for free. Store the old oil in a sealed container and transport it carefully. Proper disposal protects the environment and keeps you compliant with local regulations.
Final Thoughts on Successfully Completing This Job
Changing your own oil is one of the most rewarding maintenance tasks you can do. It saves money, builds mechanical confidence, and keeps your engine healthy. Follow the steps carefully and do not skip any safety precautions. Use the right oil type, a quality oil filter, and proper torque specifications for your vehicle.
Keep a record of each change and track your mileage. This simple habit extends the life of your engine significantly. If you ever run into trouble starting the car after maintenance, remember that safe methods to start a car without a key are available to help you out.
With the right preparation and a little practice, you will handle every future oil change with ease. Your engine will thank you for the care and attention you give it. Now grab your tools, get under there, and give your car the fresh engine oil it deserves.