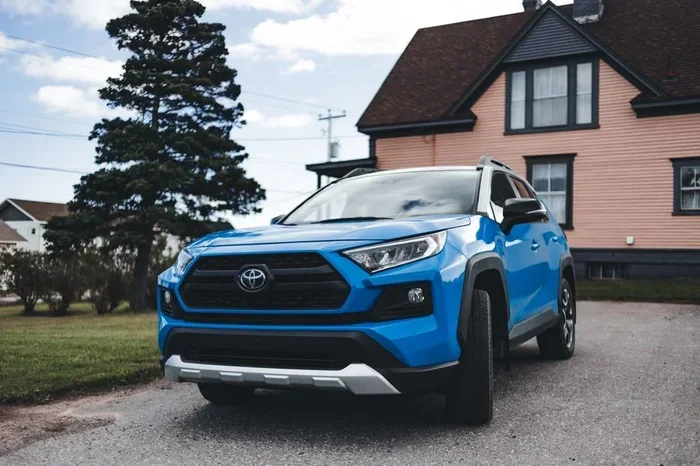
RAV4 Cabin Filter Replacement Made Simple and Easy
Replacing your RAV4 cabin filter is one of the easiest DIY maintenance tasks you can do at home. This guide walks you through everything you need to know about the RAV4 cabin filter replacement process, from finding the filter location to choosing the right replacement part. You will save money, improve air quality inside your vehicle, and keep your Toyota RAV4 running smoothly with just a few simple steps.
If you own a Toyota RAV4, you already know it is a reliable and practical SUV. But even the best vehicles need regular maintenance to keep running at their best. One job that often gets overlooked is the RAV4 cabin filter replacement. It might not sound exciting, but trust me, it makes a real difference in how your car feels every single day.
Your cabin air filter traps dust, pollen, mold spores, and other tiny particles before they enter your car’s interior. Over time, that filter gets clogged and dirty. When it does, your air quality inside the vehicle drops. You might notice more dust on the dashboard, weaker airflow from the vents, or a musty smell when you turn on the air conditioning. None of that is fun to deal with.
The good news is that swapping out a dirty cabin filter is incredibly simple. You do not need a mechanic, fancy tools, or hours of free time. In most cases, you can finish the job in less than fifteen minutes right in your driveway. This guide will show you exactly how to do it, step by step, so you can tackle the RAV4 cabin filter replacement with total confidence.
Key Takeaways
- Easy DIY Job: You can complete the RAV4 cabin filter replacement in under 15 minutes without any special tools.
- Improves Air Quality: A clean cabin air filter reduces pollen, dust, and allergens inside your car.
- Saves Money: Doing it yourself costs a fraction of what a dealership or mechanic would charge.
- Simple Location: The filter is easy to access behind the glove box on most RAV4 models.
- Regular Maintenance: Replace your filter every 15,000 to 30,000 miles for best performance.
- Boosts HVAC Performance: A fresh filter improves airflow and helps your air conditioning work more efficiently.
📑 Table of Contents
- Why Cabin Filter Replacement Matters for Your RAV4
- How Often Should You Replace Your RAV4 Cabin Filter?
- What You Need for RAV4 Cabin Filter Replacement
- Step-by-Step RAV4 Cabin Filter Replacement Guide
- Common Mistakes to Avoid During Cabin Filter Replacement
- Expert Tips for Keeping Your RAV4 Cabin Filter in Top Shape
- RAV4 Cabin Filter Replacement vs. Dealership Service
- Final Thoughts on RAV4 Cabin Filter Replacement
Why Cabin Filter Replacement Matters for Your RAV4
Some people think the cabin filter is just a minor detail. It is not. The cabin air filter plays a big role in your daily driving experience. It directly affects the air you and your passengers breathe inside the vehicle. Let us break down why keeping it fresh matters so much.
Better Air Quality Inside Your Car
Think about how much time you spend inside your car. You drive to work, run errands, take road trips, and maybe carpool your kids. All of that time means you are breathing the air that flows through your Toyota RAV4‘s interior. A clean cabin filter catches pollen, dust, exhaust particles, and even bacteria before they reach you. A dirty filter lets all of that pass right through.
If you or anyone in your family suffers from allergies, this is especially important. A fresh cabin air filter can significantly reduce allergens inside your car. You will notice the difference the moment you turn on the fan and breathe in clean, fresh air.
Improved HVAC System Performance
Your vehicle’s heating, ventilation, and air conditioning system relies on proper airflow to work well. When the cabin filter gets clogged with dirt and debris, it restricts airflow. That means your air conditioning might not cool as effectively. Your heater might blow weakly in the winter. A clean filter keeps everything flowing smoothly and helps your HVAC system operate at peak efficiency.
Prevents Unpleasant Odors
Have you ever turned on your car’s air conditioning and smelled something musty or stale? That is often a sign of a dirty cabin filter. Mold and mildew can build up in a clogged filter, and those odors get blown right into your car. Replacing the filter regularly is one of the easiest ways to keep your RAV4 smelling fresh and clean.
How Often Should You Replace Your RAV4 Cabin Filter?
Knowing when to replace your filter is just as important as knowing how. The Toyota RAV4 owner manual provides general guidance, but your actual driving conditions play a big role too.
General Replacement Guidelines
Most experts recommend replacing the cabin air filter every 15,000 to 30,000 miles. For many drivers, that translates to once or twice a year. If you drive your RAV4 mostly on highways in clean air conditions, you might stretch it a bit longer. But if you drive in heavy traffic, dusty roads, or areas with lots of pollen, you should replace it more frequently.
Here are some signs that your cabin filter needs attention:
- Reduced airflow from the vents
- Unusual or musty odors when the fan is on
- Increased dust buildup inside the car
- Worsening allergy symptoms while driving
- Weak air conditioning performance
Driving Conditions That Require More Frequent Replacement
Not all driving is equal. Certain conditions cause your cabin filter to clog faster. If any of these sound familiar, consider replacing your filter more often:
- Driving on unpaved or gravel roads regularly
- Living in an area with high pollen counts
- Dealing with heavy air pollution or smog
- Frequently driving in dusty or construction-heavy areas
- Using your RAV4 for off-road adventures
Checking your filter every few months takes only a couple of minutes. Just pull it out and hold it up to the light. If you cannot see light through it, it is time for a new one.
What You Need for RAV4 Cabin Filter Replacement
One of the best things about this job is how little you need. You do not have to invest in any special equipment. Here is your simple shopping list before you get started.
Tools and Materials
- Replacement cabin filter — Make sure you get the correct size for your RAV4 model year
- A small flathead screwdriver or trim removal tool
- A flashlight (optional but helpful)
- A clean cloth or paper towel
- Your Toyota RAV4 owner manual for reference
Choosing the Right Cabin Filter
Not all cabin filters are the same. You have a few options to choose from when shopping for a replacement:
Standard particulate filters are the most basic and affordable option. They trap dust, pollen, and other larger particles effectively. They work well for everyday driving and are a solid choice for most RAV4 owners.
Activated carbon filters go a step further. They contain a layer of activated carbon that helps absorb odors, exhaust fumes, and volatile organic compounds. If you care about air quality and want fresher air inside your car, this is a great upgrade.
HEPA filters offer the highest level of filtration. They can trap extremely small particles, including some bacteria and fine dust. These are ideal if you live in an area with poor air quality or if anyone in your family has severe allergies. The cabin filter cost is a bit higher, but the air quality improvement is worth it.
| Filter Type | Filtration Level | Best For | Approximate Cost |
|---|---|---|---|
| Standard Particulate | Basic dust and pollen | Everyday driving | $10 – $20 |
| Activated Carbon | Odor and fume reduction | Urban driving | $15 – $25 |
| HEPA Filter | Fine particle and allergen removal | Allergy sufferers, poor air quality | $20 – $35 |
You can find replacement filters at auto parts stores, online retailers, or even your local Toyota dealership. Just double-check your model year to make sure you get the right fit.
Step-by-Step RAV4 Cabin Filter Replacement Guide
Now for the part you have been waiting for. The actual RAV4 cabin filter replacement process is straightforward and satisfying. Follow these steps and you will be done before you know it.
Step 1: Park Your RAV4 and Gather Your Tools
Find a flat, level surface to park on. Turn off the engine and let the car cool down if you have been driving. Open the glove box and remove everything from inside it. You want a clear workspace and easy access to the filter compartment.
Step 2: Remove the Glove Box
This is the part that surprises most first-timers. You do not need to completely remove the glove box, but you do need to disconnect it. Open the glove box fully and look for the stop pin on each side. Press or squeeze the pins inward to release the glove box. It will swing down, giving you clear access to the filter housing behind it.
On some RAV4 model years, there may be a screw or bolt holding the glove box in place. If you see one, simply unscrew it with a Phillips head screwdriver. Keep the screw somewhere safe so you do not lose it.
Step 3: Access the Cabin Filter Housing
Once the glove box is out of the way, you will see the cabin filter housing. It is a rectangular plastic cover, usually held in place by a couple of clips or a latch. Look for any tabs or latches and release them carefully. Pull the cover straight out to expose the old cabin filter.
Take a moment to observe how the old filter is seated. Notice the airflow direction arrow printed on the filter frame. This arrow shows which way air flows through the filter, and you will need to match that direction when installing the new one.
Step 4: Remove the Old Filter
Carefully pull the old cabin filter out of its housing. It will likely be covered in dust and debris, so try to keep it contained. You might want to do this over a trash can or a bag. Use a clean cloth to wipe out any loose dirt or leaves inside the housing before installing the new filter.
Take a quick look at the old filter. If it is dark gray or black and clogged with debris, that confirms it was definitely time for a replacement. A clean filter should look light gray or white and feel slightly papery.
Step 5: Install the New Cabin Filter
Take your new cabin air filter and hold it up to the old one. They should be the same size and shape. Make sure the airflow direction arrow on the new filter matches the direction of the old filter. Slide the new filter into the housing, seating it firmly in place.
Double-check that the filter sits flat and is not folded or twisted. A crooked filter will not perform as well and could restrict airflow.
Step 6: Reassemble the Glove Box and Test
Slide the filter housing cover back into place and snap the clips or latch closed. Push the glove box back up and let the stop pins click into position. If you removed a screw, tighten it back in now.
Close the glove box and start the engine. Turn on the fan and air conditioning. Check that the airflow feels strong and even from all vents. You should notice an immediate improvement in air quality and airflow. Congratulations, you just completed your RAV4 cabin filter replacement!
Common Mistakes to Avoid During Cabin Filter Replacement
Even though this is a simple job, there are a few mistakes that people commonly make. Avoiding these will save you time and frustration.
Forgetting to Check the Airflow Direction
The airflow arrow on the cabin filter matters. Installing the filter backwards can reduce its effectiveness and restrict airflow. Always match the new filter’s arrow direction to the old filter’s position.
Not Cleaning the Housing First
When you remove the old filter, the housing may have accumulated dust, leaves, or debris. A quick wipe-down before installing the new filter keeps those particles from blowing into your car’s interior.
Using the Wrong Filter Size
Toyota RAV4 models from different years may use slightly different filter sizes. Always verify the correct part number for your specific model year. Using the wrong size filter can lead to poor fitment and reduced filtration.
Ignoring the Glove Box Stop Pins
If you do not properly reattach the glove box stop pins, the glove box may rattle while driving or block the filter housing cover from closing correctly. Make sure each pin clicks back into place.
Expert Tips for Keeping Your RAV4 Cabin Filter in Top Shape
Once you have replaced your filter, a few simple habits will help you get the most out of it between replacements.
Check your filter regularly. A quick visual inspection every few months takes almost no time and tells you a lot about the filter’s condition. If it looks dirty, do not wait for the mileage mark to replace it.
Run the recirculation mode sparingly. While recirculation is great for cooling your car quickly on a hot day, it can push more dust and particles through the filter. Using fresh air mode periodically helps keep the system balanced.
Keep your car clean inside. Vacuuming the interior regularly reduces the amount of dust and debris that ends up in the cabin filter. Less dirt entering the system means the filter lasts longer and works better.
Consider a premium filter. If you have allergies or live in a polluted area, spending a little extra on an activated carbon or HEPA cabin filter can make a noticeable difference in your driving comfort.
RAV4 Cabin Filter Replacement vs. Dealership Service
You might wonder whether it is worth doing this yourself or just taking your RAV4 to the dealership. Let us compare the two options.
At a dealership, a RAV4 cabin filter replacement typically costs between $40 and $80, including parts and labor. The actual filter itself costs between $10 and $35 depending on the type. So you are paying mostly for the service, not the part. When you do it yourself, you pay only for the filter. That is a significant savings over time, especially if you replace the filter regularly as recommended.
Beyond the cost savings, doing it yourself gives you full control over the quality of the filter you use. You can choose a premium HEPA filter or activated carbon filter without paying a markup. You also learn more about your vehicle, which builds confidence for other DIY car maintenance tasks down the road.
The dealership does have one advantage: they have trained technicians who can spot other potential issues while working on your car. But for a straightforward cabin filter replacement, the DIY route is hard to beat.
Final Thoughts on RAV4 Cabin Filter Replacement
The RAV4 cabin filter replacement is one of the simplest and most rewarding maintenance tasks you can do for your Toyota RAV4. It takes just a few minutes, costs very little, and delivers immediate results. You will notice fresher air, stronger airflow, and a better driving experience from the moment you finish.
Do not let this small job slip your mind. Set a reminder on your phone or mark your calendar every 15,000 to 30,000 miles. A few minutes of effort now saves you money and keeps your car running at its best for years to come. Your RAV4 takes care of you — this is a small way to take care of it right back.
Grab a replacement cabin air filter, gather your tools, and give it a try. You will be surprised how easy and satisfying it is. Once you have done it once, you will never want to pay someone else to do it again.
Frequently Asked Questions
Where is the cabin filter located on a Toyota RAV4?
The cabin filter on most Toyota RAV4 models is located behind the glove box. You access it by removing or lowering the glove box to expose the filter housing. Refer to your RAV4 owner manual for the exact location specific to your model year.
How much does it cost to replace a RAV4 cabin filter?
A RAV4 cabin filter replacement costs between $10 and $35 for the filter part itself if you do it yourself. If you have a dealership or mechanic do it, expect to pay $40 to $80 total including labor. The DIY approach saves you a significant amount of money.
Can I reuse my old cabin filter after cleaning it?
No, cabin filters are designed to be disposable. Unlike engine air filters that can sometimes be cleaned and reused, cabin filters trap fine particles, pollen, and allergens that embed deep in the filter material. Replacing it with a fresh one ensures the best air quality and performance.
How long does the RAV4 cabin filter replacement take?
A RAV4 cabin filter replacement typically takes between 10 and 15 minutes for most drivers, even if it is your first time. Once you have done it a couple of times, you can finish it in under five minutes. It is one of the quickest DIY maintenance jobs you can do.
What happens if I do not replace my RAV4 cabin filter?
Neglecting the cabin filter replacement leads to reduced airflow, weaker air conditioning, musty odors, and poor air quality inside your car. Over time, a severely clogged filter can even put extra strain on your vehicle’s HVAC system, potentially leading to costly repairs down the road.
Is the cabin filter the same as the engine air filter?
No, they are two different filters with different jobs. The cabin air filter cleans the air that enters your car’s interior through the vents. The engine air filter cleans the air that enters the engine for combustion. Your RAV4 has both, and both need regular replacement as part of proper Toyota RAV4 maintenance.
=== CONCLUSION ===
The RAV4 cabin filter replacement is a quick, easy, and affordable maintenance task that every Toyota RAV4 owner should know how to do. It improves your air quality, boosts HVAC performance, and keeps your car smelling fresh. With just a few simple tools and a new filter, you can complete the job in under fifteen minutes and enjoy the benefits immediately.
Do not wait until you notice weak airflow or strange odors. Make the RAV4 cabin filter replacement part of your regular maintenance routine and your car — and your lungs — will thank you. Grab that new filter today and give it a try. You have nothing to lose and fresh, clean air to gain.